Working with workspaces
Section author: David Nickerson
All models in the Auckland Physiome Repository exist in workspaces, which are Git repositories that can be used to store any kind of file. Git is a distributed version control system (DVCS).
In order to create your own workspaces, you will first need to create a repository account by registering at models.physiomeproject.org. Near the top right of the repository page there will be links labelled Log in and Register. Click on the register link, and follow the instructions.
Workspaces in the Auckland Physiome Repository are permanent once they are created. There is a teaching instance of the repository which may be used for experimenting with features of the software without worrying about creating permanent workspaces that might have errors in them. Users accounts and data from the Auckland Physiome Repository will be copied to the teaching instance periodically, overwriting all data there in the process, but users may register for an account just on the teaching instance if they prefer. Such accounts will need to be recreated each time the teaching instance is overwritten.
Note
The teaching instance of the repository is a mirror of the main repository site found at https://teaching.physiomeproject.org/, running the latest development version of PMR2. User accounts are periodicly synchronised from the main repository, but if you recently created an account on the main site you might need to also create a new account on the teaching instance.
Any changes you make to the contents of the teaching instance are not permanent, and will be overwritten with the contents of the main repository whenever the teaching instance is upgraded to a new release of PMR2. For this reason, you can feel free to experiment and make mistakes when pushing to the teaching instance. Please subscribe to the cellml-discussion mailing list to receive notifications of when the teaching instance will be refreshed.
See the section Migrating content to the main repository for instructions on how to migrate any content from the teaching instance to the main (permanent) Auckland Physiome Repository.
Creating a new workspace
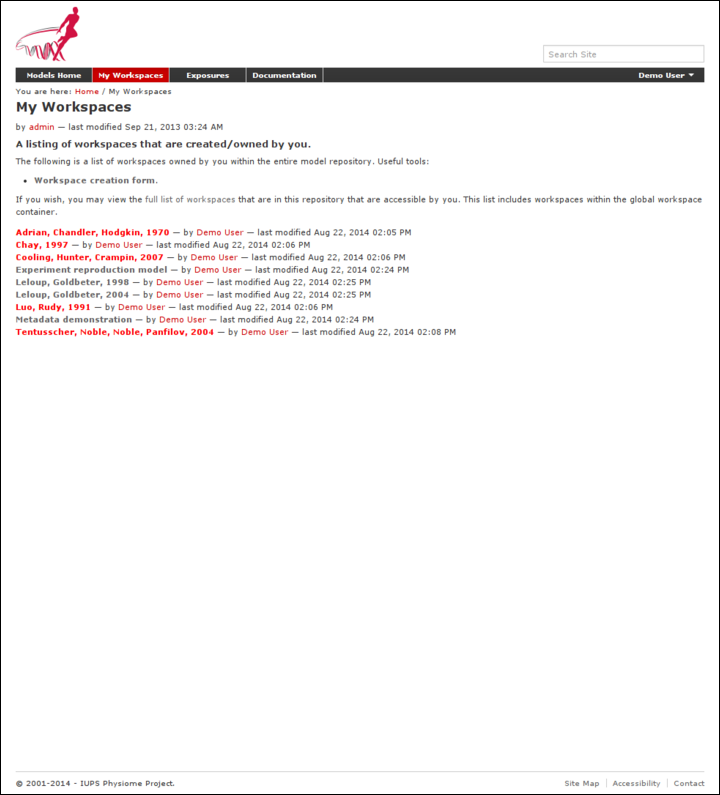
Once a user is logged into Auckland Physiome Repository, they will be presented with a My Workspaces link in the top toolbar, as shown below:
The first paragraph includes a link to your dashboard to add a new workspace, shown below:
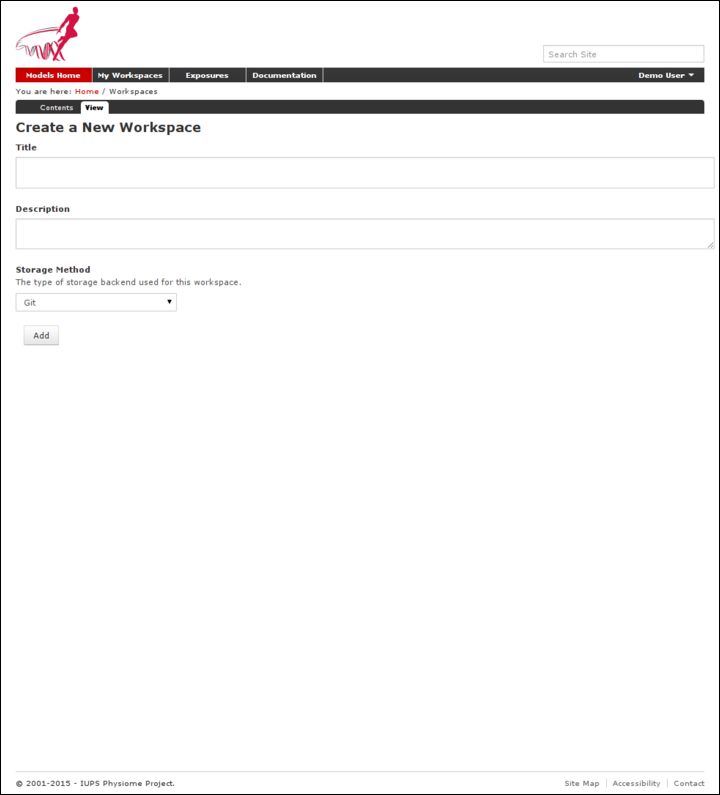
Currently Git is the only avialable option for the storage method for a new workspace, but this may be expanded to include other storage methods in future. A workspace should be given a meaningful title and a brief description to help locate the workspace using the repository search. Both these fields can be edited later, so don’t worry if you don’t get it perfect the first time.
Clicking the Add button with then create the workspace, which will initially be empty, as shown below:
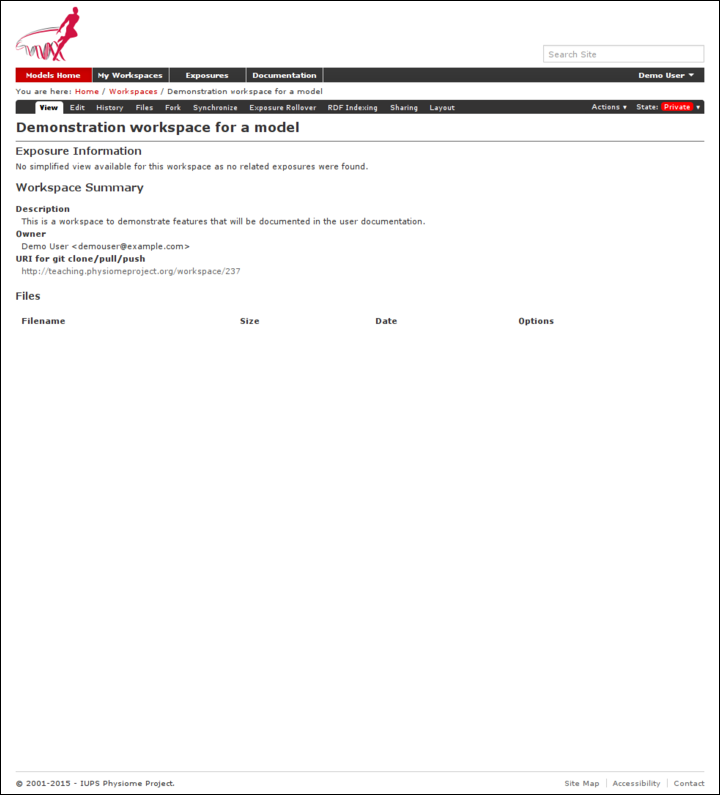
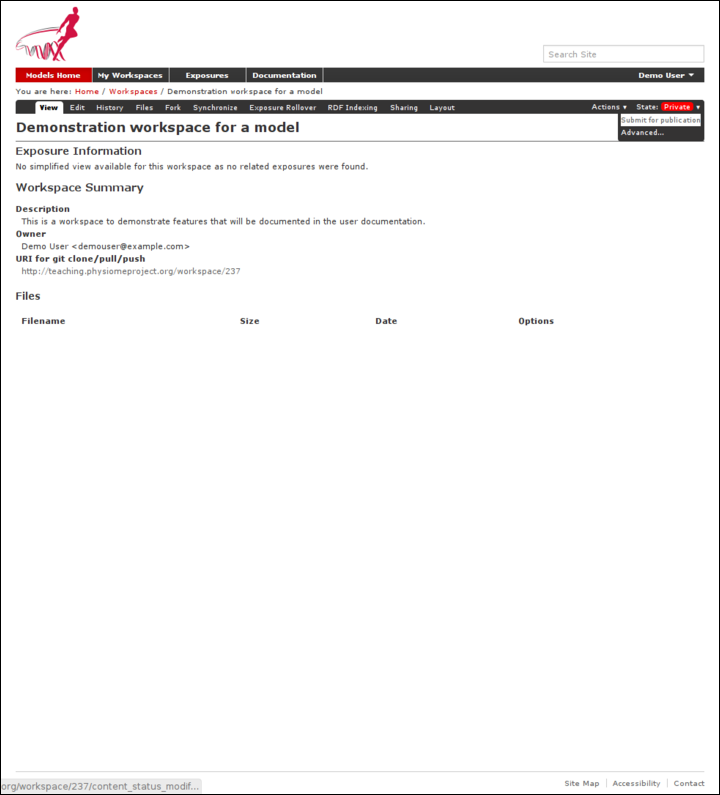
In the figure above, the URI of the newly created workspace has been highlighted. This is the URI that will be used when operating on the workspace using Git.
Working with collaborators
The repository makes use of Git to manage individual workspaces. Git is a Distributed Version Control System (DVCS), and as such encourages collaborative development of your model, dataset, results, etc. Using Git, each member of the development team is able to have their own clone of the workspace which can be kept synchronized with the other members of the development team, while ensuring that each team member’s contributions are accurately recorded in the workspace history.
Once a workspace has been published, any registered users (or members) of the repository is able to access and clone the workspace, including team members and the anonymous public. Only the owner and those with privileges granted by the owner are able to make changes to the workspace, including pushing changes into the Git repository. Private workspaces, however, can only be viewed by its owner and those with viewing privileges granted by its owner.
Auckland Physiome Repository provides access controls to manage the ability of its members and anonymous users to interact with workspaces. The access control is managed via the Sharing tab for a given workspace, as shown below.
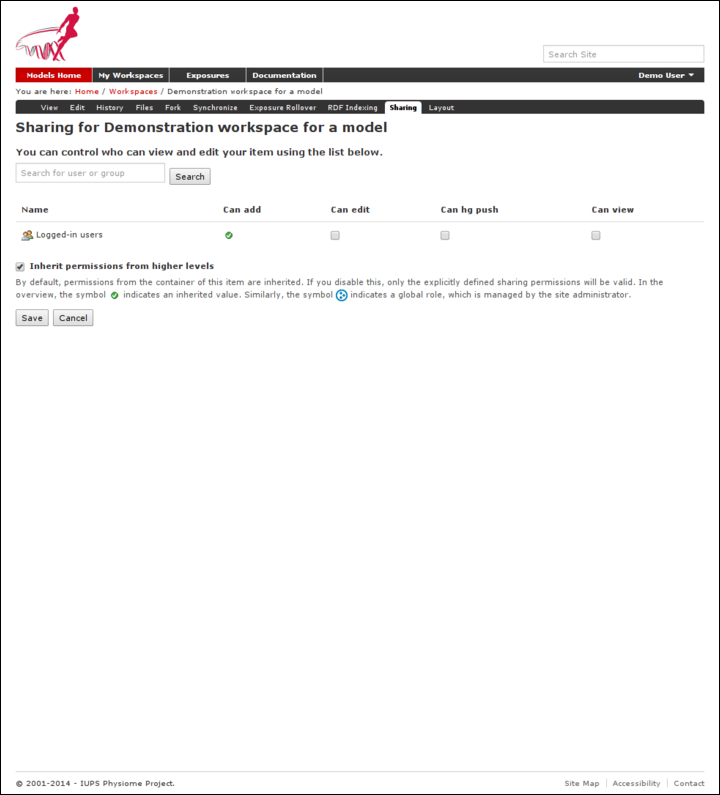
By default, you will initially see that all logged-in user has the Can add permission. That is the inherited permission from the global workspace container, and does not imply that they can view your work as that is determined by the Can view permission. This also does not mean that they can add data to your workspace. This permission setting is applied to the default workspace container so that you and all other users of the system have the ability to create new workspaces.
PMR2 has the option to provide individual containers per user for their private workspaces, but this option is now disabled in the Auckland Physiome Repository.
You can disable the inherited higher level permissions from your workspace by unchecking the Inherit permissions from higher levels checkbox, if you wish, but the administrators of the repository can access your workspace regardless if you wish for them to aid you with your workspace. Using the Sharing tab you are able to search for other members, such as the names of people in your development team. These members would then appear in the list of members and you are able to set their access as required.
Using the Sharing controls there are currently four possible permissions that can be controlled. The Can add and Can edit permissions relate to the object that represents the workspace in the website database and are generally left in the default state. When selected for a given member, the Can view permission allows that member to view the workspace on the website, even if the workspace is private. Similarly, when the Can push permission is enabled the selected member is able to push into the workspace - this is the most important permission as enabling this allows members to add, modify, and delete the actual content of the workspace. One benefit of using Git means that even if one of the privileged members accidentally modifies the workspace in a detrimental manner, it is possible to revert the workspace back to the correct state.
When working in a collaborative team you would generally enable the Can push and Can view permissions for all team members and only enable the Can add and Can edit permissions for the team members responsible for the workspace presentation in the website.
Making your workspace public
If you wish to make your work available for searching by any users, including the ones who do not have an account with the repository, you may do so by changing the workflow state from “private” to “submit for publication”. This will put your workspace into the reviewer queue and they will turn it into the “published” state.
Uploading files to your workspace
The basic process for adding content to a workspace consists of the following steps:
- Clone the workspace to your local machine.
- Add files to cloned workspace.
- Commit the files using a Git client.
- Push the workspace back to the repository.
An example demonstrating these steps can be found in in this tutorial step: Populate with content, or continue on to the next section of this guide.
Other hints and tips
- Avoid putting large binary data files into the workspace, as that will slow down users who wish to clone the repository. Especially archive of the data that are already in the workspace - the repository offers services to generate archive file download links.
- Documentation should be written in either HTML or reStructuredText, as these formats are currently supported by the repository for formatted rendering.
Troubleshoot
If during a git push something like this happened:
$ git push http://models.example.com/workspace/test
Counting objects: 101, done.
Delta compression using up to 8 threads.
Compressing objects: 100% (101/101), done.
error: RPC failed; result=55, HTTP code = 0
fatal: The remote end hung up unexpectedly
Writing objects: 100% (101/101), 1.42 MiB | 0 bytes/s, done.
Total 101 (delta 59), reused 0 (delta 0)
fatal: The remote end hung up unexpectedly
Everything up-to-date
This is caused by an insufficiently large http.postBuffer provided
by the default Git configuration (1 MiB). This needs to be in the
.gitconfig file:
[http]
    postBuffer = 524288000
Issue this command to add it globally:
git config --global http.postBuffer 524288000
Alternatively, if TortoiseGit is used, edit one of the relevant configuration files as per `documentation`_ on this.