Creating FieldML exposures
Section author: Dougal Cowan
FieldML models in the Auckland Physiome Repository are presented through exposures. A FieldML exposure has some similarities to a CellML exposure - usually consisting of a main documentation page with some information about the model, accompanied by a range of different views of the model data and or metadata. FieldML exposures also allow the real-time three-dimensional display of model meshes within the browser through the use of the Zinc plugin.
The example screenshots below show the main documentation page view and the 3D visualization provided by the Zinc viewer.
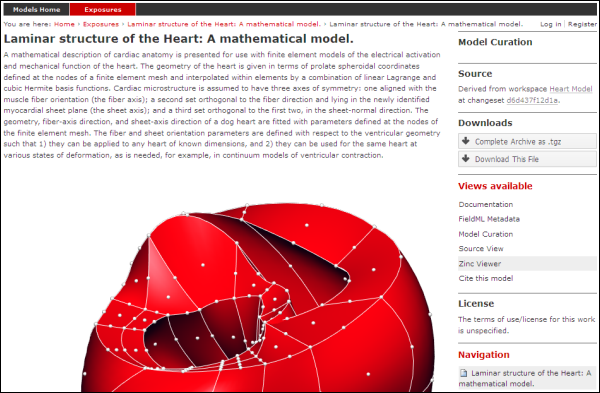
The main documentation view of a FieldML exposure
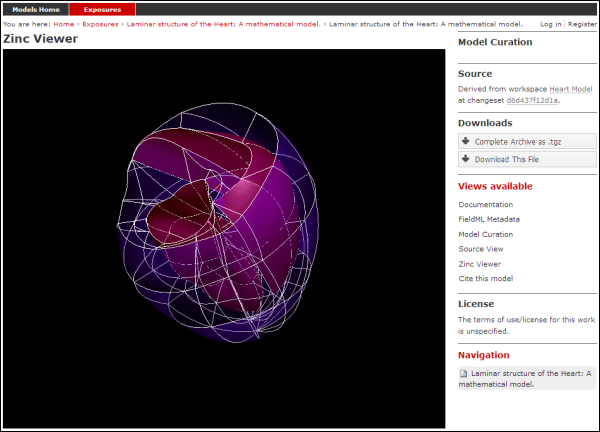
The main Zinc viewer view of the same FieldML exposure
Creating the exposure files
To create a FieldML exposure, the following files will need to be stored in a workspace in the repository:
- The FieldML model file(s)
- An RDF file containing metadata about the model, and specifying the JSON file to be used to specify the visualization.
- The JSON file that specifies the Zinc viewer visualization.
- Optionally, documentation (HTML) and images (PNG, JPG etc).
The following example RDF file from comes from the Laminar Structure of the Heart workspace in the repository:
1 2 3 4 5 6 7 8 9 10 11 12 13 14 15 16 17 18 19 20 21 22 23 24 25 26 27 28 29 30 31 32 33 34 35 36 37 38 39 | <?xml version="1.0" encoding="utf-8"?>
<rdf:RDF
xmlns="http://www.w3.org/1999/02/22-rdf-syntax-ns#"
xmlns:rdf="http://www.w3.org/1999/02/22-rdf-syntax-ns#"
xmlns:dc="http://purl.org/dc/elements/1.1/"
xmlns:dcterms="http://purl.org/dc/terms/"
xmlns:vCard="http://www.w3.org/2001/vcard-rdf/3.0#"
xmlns:pmr2="http://namespace.physiomeproject.org/pmr2#">
<rdf:Description rdf:about="">
<dc:title>
Laminar structure of the Heart: A mathematical model.
</dc:title>
<dc:creator>
<rdf:Seq>
<rdf:li>LeGrice, I.J.</rdf:li>
<rdf:li>Hunter, P.J.</rdf:li>
<rdf:li>Smaill, B.H.</rdf:li>
</rdf:Seq>
</dc:creator>
<dcterms:bibliographicCitation>
American Journal of Physiology 272: H2466-H2476, 1997.
</dcterms:bibliographicCitation>
<dcterms:isPartOf rdf:resource="info:pmid/9176318"/>
<pmr2:annotation rdf:parseType="Resource">
<pmr2:type
rdf:resource="http://namespace.physiomeproject.org/pmr2/note#json_zinc_viewer"/>
<pmr2:fields>
<rdf:Bag>
<rdf:li rdf:parseType="Resource">
<pmr2:field rdf:parseType="Resource">
<pmr2:key>json</pmr2:key>
<pmr2:value>heart.json</pmr2:value>
</pmr2:field>
</rdf:li>
</rdf:Bag>
</pmr2:fields>
</pmr2:annotation>
</rdf:Description>
</rdf:RDF>
|
This file provides citation metadata and a reference to the resource that specifies the Zinc viewer JSON file which will be used to describe the 3D visualisation of the FieldML model. The file breaks down into three main sections:
- Lines 3-8, namespaces used.
- Lines 10-23, citation metadata.
- Lines 24-37, resource description. Used to specify the JSON file that specifies the visualisation.
Example of the JSON file from the same (Laminar Structure of the Heart) workspace:
1 2 3 4 5 6 7 8 9 10 11 12 13 14 15 16 17 18 19 20 21 22 23 24 25 26 27 28 29 30 31 32 33 34 35 36 37 38 39 40 41 42 43 44 45 46 47 48 49 | {
"View" : [
{
"camera" : [9.70448, -288.334, -4.43035],
"target" : [9.70448, 6.40667, -4.43035],
"up" : [-1, 0, 0],
"angle" : 40
}
],
"Models": [
{
"files": [
"heart.xml"
],
"externalresources": [
"heart_mesh.connectivity",
"heart_mesh.node.coordinates"
],
"graphics": [
{
"type": "surfaces",
"ambient" : [0.4, 0, 0.9],
"diffuse" : [0.4, 0,0.9],
"alpha" : 0.3,
"xiFace" : "xi3_1",
"coordinatesField": "heart.coordinates"
},
{
"type": "surfaces",
"ambient" : [0.3, 0, 0.3],
"diffuse" : [1, 0, 0],
"specular" : [0.5, 0.5, 0.5],
"shininess" : 0.5,
"xiFace" : "xi3_0",
"coordinatesField" : "heart.coordinates"
},
{
"type": "lines",
"coordinatesField" : "heart.coordinates"
}
],
"elementDiscretization" : 8,
"region_name" : "heart",
"group": "Structures",
"label": "heart",
"load": true
}
]
}
|
- Lines 2-8, sets up the camera or viewpoint for the initial Zinc viewer display.
- Lines 12-18, specifies the FieldML model files
- Lines 19-41, set up the actual visualisations of the mesh - in this case, two different surfaces and a set of lines.
- Lines 42-46, specify global visualisation settings.
For more information on these settings, please see the cmgui documentation.
Note
The specifics of these RDF and JSON files are a work in progress, and may change with each new version of the Zinc viewer plugin or PMR2.
Creating the exposure in the Auckland Physiome Repository
First you will need to create a workspace to put your model in, following the process outlined in the document on working with workspaces.
- Upload your FieldML model files and Zinc viewer specification files.
- Find revision of workspace you wish to expose and create exposure
Exposure wizard procedure
View generator as per CellML; select HTML annotator and HTML doc file
New exposure file entry: select .rdf file and select FieldML (JSON) type. Click Add.
- Documentation file - same as above
- Curation flags - none (should be removed?)
- No other settings
Click Update.
Click Build.
To see the 3D visualisation, you will need to have the latest Zinc plugin installed.